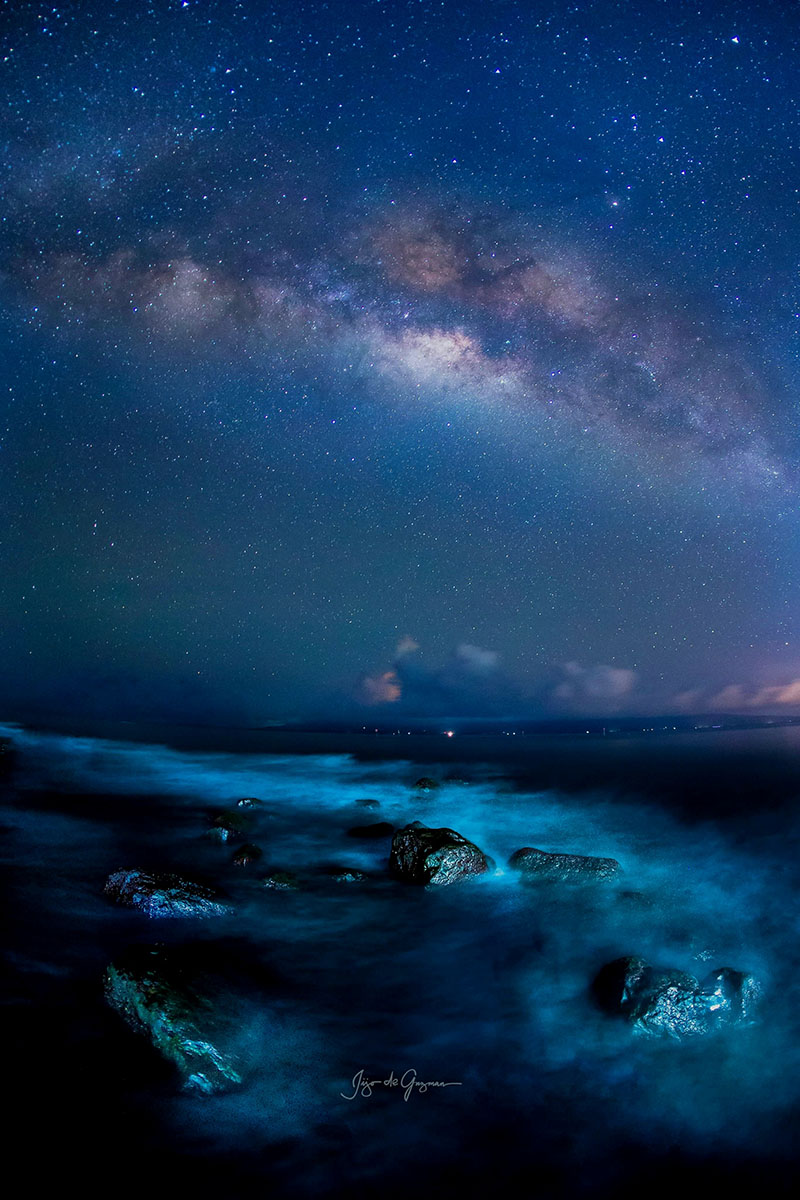
We’re right smack in the middle of the Summer Milky Way season in the Philippines. Here are some tips on how to effectively shoot it.
1. SEASON: The Milky Way can be seen in the South-South East night sky over the Philippines between late February and early July. However, up until mid-March, it rises late, meaning close to the sunrise, and so you will only have a short window of time to shoot it before the sun comes out. On the other hand, in early July, it shows as soon as darkness falls, but this time is already usually the start of the Monsoon season, therefore cloud cover at night may hamper your shooting. With that said, April to June are the best months to shoot it.
2. LOCATION: You must go to a location with no or very little environmental and light pollution. Usually that means going outside of Metro Manila. Popular nearby destinations include San Juan, Nasugbu, and Calatagan, all in Batangas. Other popular destinations are Quezon, Bataan, Zambales, Baguio, and Baler.
3. WEATHER AND TIMING: Check the weather forecast and choose an ideal night. This means little or no chance of rain with little to no cloud cover. The days between the quarter moons and new moon are also ideal because the light of a full or close to full moon will overpower the light of the stars. Full moons can be an exception if the rise and set times will still give you time to shoot at night.
4. GEAR: Ideal gear would be a camera with very good noise-handling capabilities, a lens with an aperture of f2.8 or larger, and a sturdy tripod with ball-head. A flashlight will also come in handy since you are shooting at night. A wide focal length of between 16-24mm is usually ideal. In some cases, a 35 to 50mm may also work well.
5. SETTINGS: My usual settings for shooting it using a 16mm is 30 seconds at f2.8 at an ISO 2000-3200 (depending on how clear the sky is and your exposure time). However, your maximum exposure time will vary depending on the focal length of your lens. This is where the “500 Rule” applies. This rule is based on the fact that the Earth rotates in relation to the stars. Therefore, this movement can cause blur if you don’t manage it well. Because of this, you must divide 500 by your focal length to get your maximum exposure time. E.g. for Full Frame Cameras with a 16mm: 500 / 16 = 31 seconds. For Cropped Cameras with 16mm: 500 / (16 X 1.6) = 19 seconds (use PEMDAS).
6. FRAMING, COMPOSITION AND FOCUSING: Composing and Framing a Milky Way photo is very similar to how it’s done in Landscape photos. Ideally you must have a foreground, middleground, and background. The only difference is that you will include more of the sky in the frame. Make sure you also keep your horizon straight. Focusing should be set to infinity or to a foreground not less than 3 meters from your camera. Since it is much harder to frame and compose at night, you will have to do a few test shots first. For these test shots, raise your ISO to shorten your exposure time. You should do this to prevent the camera sensor to heat up too much before you actually take your real shots. A heated-up sensor produces lower image quality than cooler sensors. This is also fine since you are not after high image quality anyway since they are just test shots. If you can frame, compose, and then shoot without having to do test shots, the better.
Contributor: Jijo de Guzman, CCP Master Photographer

